Introduction
Welcome to the Maker Space wiki!
Here you will find (hopefully) all the information you could possibly want to know about our hackspace, how it works, what facilities we have and how to use them.
But really, what is this?
This is a demo wiki, if you are looking for the current wiki then head here.
This site contains the actual proposal to change from our existing wiki to something very like this as well as a couple of demo pages that were either quick to write, quick to migrate or generously donated as part of testing. If you came here from the mailing list, you likely want to start reading through the proposal.
The Wiki Proposal
This section outlines the proposal to replace our existing wiki with one based on mdBook (like you are reading right now!).
- Problem Statement: outlining what is wrong with the current wiki and why we need a replacement
- Solutions Considered: an overview of each considered solution that could address the issues with the current wiki
- Proposed Solution: what I am actually suggesting we do about it
- Hypothetically Asked Questions: questions that I imagine people might have
Feedback
I welcome all feedback, but am particularly interested in hearing from wiki authors (both present and potential), given that they are the ones for whom there is a trade-off in the proposed solution, namely the slightly more complex edit/contribution workflow.
If anything is unclear, given me a shout and I'll add more details as required. Feel free to poke around the repository all you like, the link is to the top right of the page (the GitHub logo). If you are interested to see the Cloudflare side of it, give me a shout and I can show you how this looks on the dashboard (although I assure you, it is not that thrilling).
Problem Statement
In short, our current wiki is very decrepid.
- Only a handful of pages contain actually useful information
- Findability is pretty much non-existent
- The site has injected adverts from the hosting provider
- It does not support TLS, so generates a warning in most modern browsers
- It is not mobile friendly
- It is not very print friendly
- It generally looks pretty bad
The problem is certainly both content and platform, however having a platform that generates actually nice documentation from a commonly used markup would certainly be a starting point in having more documentation written and kept up to date.
Solutions Considered
Here is a brief overview of the things that have been considered before arriving at the proposed solution.
Continue using PBworks and just update the content
Essentially keep on doing what we currently are, but perhaps with a bit of a push to keep the documentation up to date.
Pros:
- Low-ish effort
- The devil you know
Cons:
- Does not fix aesthetic issues
- Does not fix accessibility issues
MediaWiki
Host a MediaWiki instance and move documentation over there.
Pros:
- Very well proven platform
- Intuitive editor
- Search out of the box
- Accessible out of the box
Cons:
- Requires hosting somewhere (plus the ongoing maintenance this involves)
mdBook
Use mdBook to generate a static site containing our documentation, with source content hosted on GitHub.
Pros:
- Well proven platform
- Intuitive editor (via GitHub's markdown editor)
- Search out of the box
- Accessible out of the box
- Good review/discussion ability via GitHub Pull Requests
- Hosted for free on platforms we already use (GitHub and Cloudflare)
Cons:
- Git based contribution workflow is more of a barrier
Proposed Solution
The proposed solution is the following:
- setup a new wiki
- migrate any existing documentation from the existing wiki
- identify and write new desired documentation
- ???
- profit
Why mdBook?
mdBook is a mature, lightweight documentation tool that generates beautiful documentation from Markdown files.
The advantages that make it ideal for our purposes include:
- It uses Markdown, likely the most common document markup language used in the world of open software/hardware, free culture, hacking and geekery:
- The EMF Camp badge and developer documentation is written in it.
- The very large majority of things on GitHub, GitLab, and other OSS repositories are documented in it.
- It generates beautifully minimal documentation, making good use of screen real estate and styled tastefully out of the box.
- It is reactive, i.e. will scale to smaller screen sizes and still be readable and navigable.
- It has good theming out of the box, respecting the system native colour scheme and using optimal colours for e.g. Dyslexia.
- It has native search functionality, which works very well.
- It can format a document for printing if desired.
So what does this actually mean in practice?
It depends, do you...
You may also be interested in the implementation plan.
Technical Details
Things used
Only three software/services are used by this solution:
I shall skip explaining what GitHub and Cloudflare are because most will already know and we already use them.
mdBook
mdBook is a static site generator, specifically designed to generate documentation in the form of books. Whilst "book-centric", you can replace the word "chapter" with "document" and it is just a hierarchical collection of documents.
It is fed plain old Markdown documents, containing nothing extra apart from the content you wish to display. The pages can be written using whatever Markdown editor the author chooses. GitHub's online Markdown rendering will show an accurate representation of what mdBook will render in the "main body content" area for a specific document.
It is a single binary with no outside dependencies that is available for all three major platforms. It is a core part of the documentation tooling for the Rust programming language, so is not going to go away overnight.
Source files
The source files will be in a repository in the MakerSpaceNewcastle organisation on GitHub. The layout/content of the repository will be pretty much identical to the one that contains this demo wiki, which you can view here.
Publishing process
Changes will be made via a Pull Request, this is so that the site can be built to verify it is syntactically correct. Pull Requests can only be merged if the GitHub Action passes.
Those wishing to edit the wiki should be members of the MakerSpaceNewcastle GitHub organisation. Otherwise the Action that runs on Pull Request's will fail to generate the preview due to not having access to the Cloudflare API key. It is still possible for a PR to be made from unknown GitHub users or from forks, but no preview will be generated.
We may choose to use this as a means of having another member review the contents, or have ownership of documents (e.g. Iain might own the membership and induction related documents, and must approve changes to it), however I suggest this be something we do later if the need arises.
Once a Pull Request is merged, a GitHub Action will build the site and publish it to Cloudflare Pages. This typically takes less than one minute.
Revocation of changes
The preferred method is via undoing the changes in the source Markdown files, either by git revert (or it's equivalent via the GitHub website) or by making the appropriate changes and following the above publishing process.
If there is a need for a quick revert to an older version, then this can be done via the Cloudflare Pages dashboard.
History
A link to the specific Cloudflare Pages deployment can be found in the GitHub Actions logs for the specific commit, selected via the green tick next to a commit on the GitHub website. e.g. click the green tick on commit, then details to get to actions logs and the link is shown in the logs for the "Publish to Cloudflare Pages" step under "Running Wrangler Commands". In future this may be easier when the appropriate GitHub Action for Cloudflare Wrangler interact with GitHub Deployments.
The history of the source files can be viewed, managed and manipulated via all the standard Git methods if the need to do so should arise.
Specific settings/configurations
Here are some specific and/or low level settings that will be used.
GitHub
General Pull Request settings
- "Allow merge commits" - uncheck
- "Allow squash merging" - check
- "Default commit message" - "Pull request title and description"
- "Allow rebase merging" - uncheck
- "Automatically delete head branches" - check
Branch ruleset for main:
- "Restrict deletions"
- "Require linear history"
- "Require a pull request before merging"
- "Dismiss stale pull request approvals when new commits are pushed"
- "Require status checks to pass"
- "Block force pushes"
This forces all changes to be made via a Pull Request, ensuring that commits that may break the site build cannot be pushed directly to main.
If we ever did want to require approval in the future, this is the place one would configure it.
Cloudflare
DNS: CNAME wiki makerspace-wiki.pages.dev.
Assuming the Pages project is called makerspace-wiki, this will result in the wiki being availale at wiki.makerspace.org.uk.
This is actually handled automatically by Cloudflare following the custom domain config in Pages, it is just here for the sake of completeness.
Editing Workflow
Please note, this document is just an overview of the processes available, it is not documentation of how to author the wiki. Actual documentation will be written in due course should this solution be selected.
In general, there are two options: editing entirely via the GitHub website, or editing locally with Git setup. If you are comfortable with Git then you likely want to use the latter option, if you are new to Git or only need to make a small change then the former option is best.
Making changes
Editing an existing page
If you just want to edit a single page then you may follow the edit link in the top right hand corner of the page. Assuming you are signed in to GitHub, this will take you directly to a page where you can edit the contents and submit a Pull Request.
Editing the wiki using GitHub via the web browser
Files may be uploaded via the GitHub website (text or images) and edited via GitHub's text editor. After uploading or editing files GitHub will prompt you to commit them and optionally create a Pull Request.
Editing the wiki locally
I am lazily going to assume I don't need to say much here. If you are familiar with Git then follow the usual create branch, do changes, commit, push, open Pull Request workflow.
It is possible to run mdBook locally, or just use any Markdown renderer you may already have to preview changes.
After the Pull Request has been created
One may wish to ask for people to review it, e.g. if you have editing a page relating to the CNC mill then you may wish to ask David Pye to look over it.
Whenever a new commit is added to a Pull Request, a GitHub Action runs which builds the page and deploys it in a test environment, allowing to to see exactly what your changes will actually look like. A bot will comment on the Pull Request with a link you can follow to read the wiki with your changes applied (always use the most recent comment).
If the bot did not post a comment, then check the status of the Action, it may show a red cross indicating that something has gone wrong. You will have to inspect the logs to see exactly what the issue is, if it is an error from mdBook then they are usually pretty descriptive as to what is wrong.
When happy the PR is merged, an Action runs and the live wiki is updated.
Demo
The site you are reading now is effectively identical in infastructure/deployment to the proposed solution. Therefore feel free to have a play around, try making some changes (things will not be as smooth as eventually intended as anyone I have not already added to the repo will need to have Actions on Pull Requests manually started).
Implementation Plan
A general idea of how this will be put into practice.
- Create a Cloudflare Pages project named "makerspace-wiki" (or something close to that) under the Maker Space account
- Create a repository named "wiki" under the MakerSpaceNewcastle GitHub organisation containing all but the content of the repository behind this wiki
- Create an API key allowing publishing to the above project and store it as a repository Actions secret in the above repository
- See that GitHub Actions publishes to the Cloudflare Pages project
- Apply repository settings described in technical details
- Apply DNS settings described in technical details
- Move the repository behind this demo wiki under the MakerSpaceNewcastle organisation and archive it
- Begin migrating content to/creating content on the new wiki
- Once the new wiki contains all of the useful information from the old wiki, replace any wiki links with
wiki.makerspace.org.uk - When we are certain that any useful content has been migrated from the old wiki, delete it.
Hypothetically Asked Questions
Isn't needing to use GitHub adding a barrier to entry for editing the wiki?
Yes. However, it is, in my view, a very small one.
Given that the process for editing can be done entirely via the browser and will be sufficiently documented, I do not see that it will be substantially worse than any other platform. As a last resort, it would also be possible for a member to make edits on behalf of another member.
The lack of ongoing maintenance, zero monetary expense, environmental benefits and security benefits of a static site position this as a trade-off worth making.
Would this mean I need to create a GitHub account to edit the wiki?
Yes (technically no, but that is probably not what you are really asking).
However, if we choose an online solution (e.g. MediaWiki), you would have to create an account for that anyway.
Isn't there a lot of individual parts?
Not really, there are effectively three core components, all of which are mature and used widely.
Why not use an online solution like MediaWiki?
Any dynamic site requires hosting somewhere. That means (in general) either paying or having adverts.
If we pay for a compute platform and manage the deployment ourselves, then it means someone has to spend time managing it.
There are also security and environmental benefits to not running a dynamic site when a static one will suffice.
But the GitHub, mdBook, Cloudflare solution does not need payment and does not have adverts? What gives?
We are well within the free tiers of GitHub and Cloudflare for what we need to do, and mdBook is FLOSS.
Equipment
Here you will find an overview of the equipment available at Maker Space.
This is a list of the significant items, there are a lot of smaller/hand tools that are around.
| Item | Location | Induction Required |
|---|---|---|
| Laser Cutter | Ground Floor, Coridoor | Yes |
| Bambu Lab P1S | Ground Floor, Main Space | No |
| Prusa MK3 | Ground Floor, Main Space | No |
| Axminster Bandsaw | Basement, Tall Side | Yes |
| Workbee CNC Router | Basement, Short Side | Yes, no, maybe |
Laser Cutter
A laser cutter. It cuts stuff using a laser.
Essential Information
- Location: Ground Floor, Corridor
- Responsible Person(s): Dan Nixon
- Induction Required: Yes
Usage notes
It is not permitted under any circumstances to leave this machine running unattended!
Bambu Lab P1S
Bambu Lab P1S with AMS and external spool caddy. A very good, quick FDM 3D printer.
Essential Information
- Location: Ground Floor, Main Space
- Responsible Person(s): Dan Nixon
- Induction Required: No
Usage notes
It is not permitted to leave this (or any other) 3D printer running whilst Maker Space is unoccupied!
While no induction is required, it is very strongly recommended to read the user guide before using the printer.
Useful links
Bambu Lab P1S user guide
Bambu Studio setup
Install
- Install and launch Bambu Suddio
- Click "Get Started"
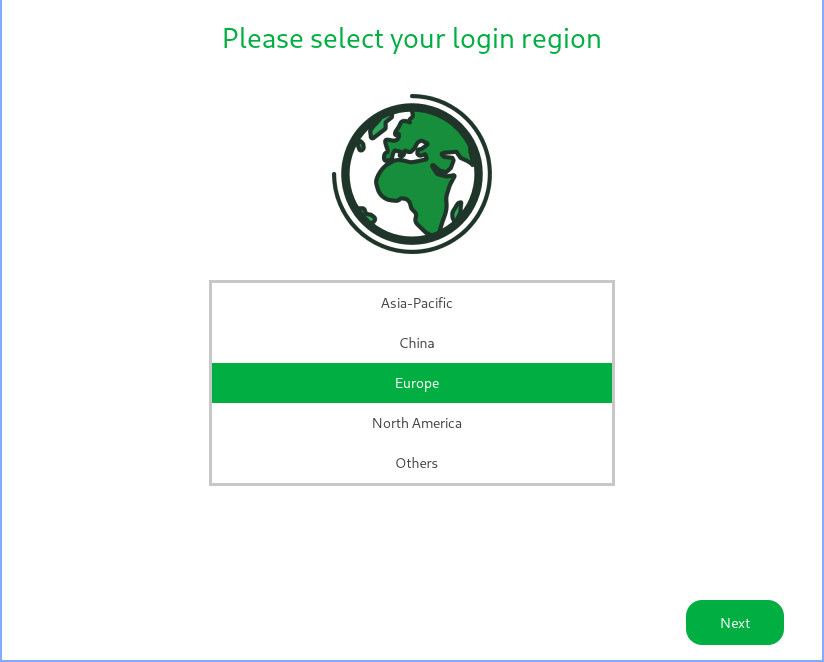
- Select "Europe"
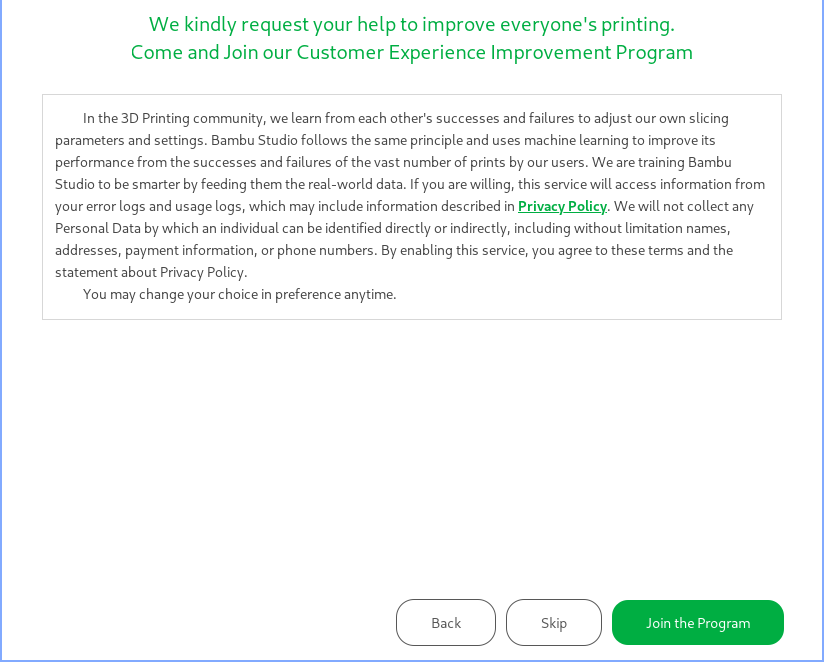
- Select "Skip"
- Select "Clear All"
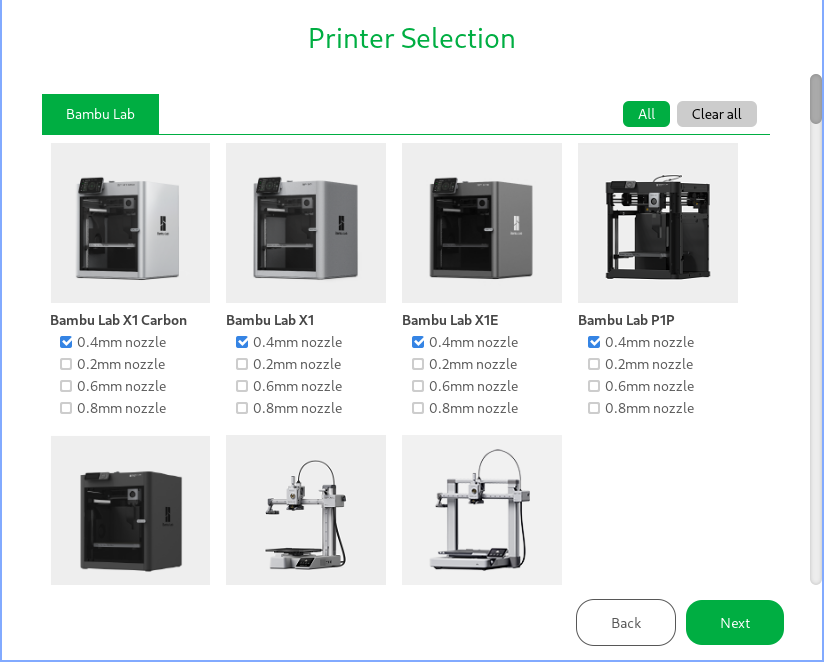
- Check "Bambu Lab P1S 0.4mm nozzle" and click "Next"
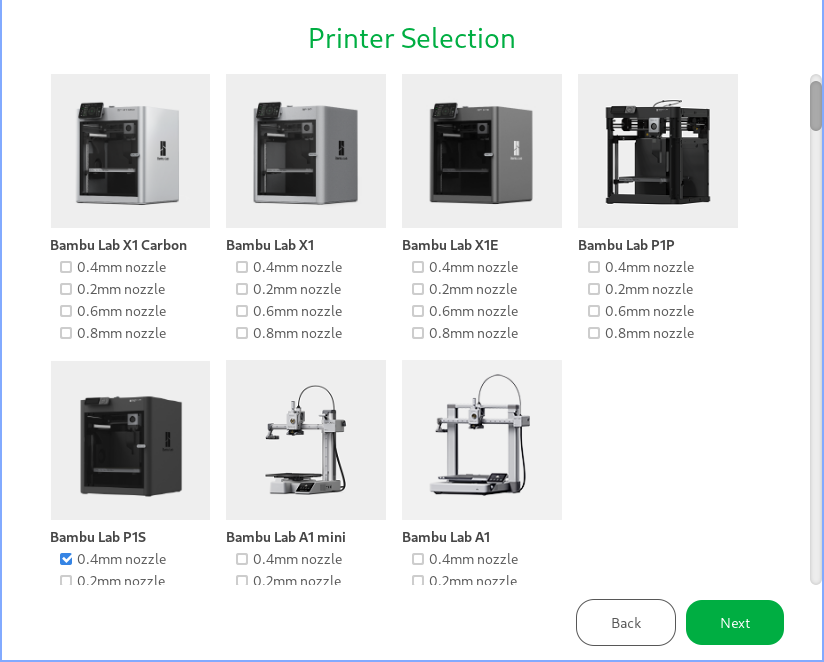
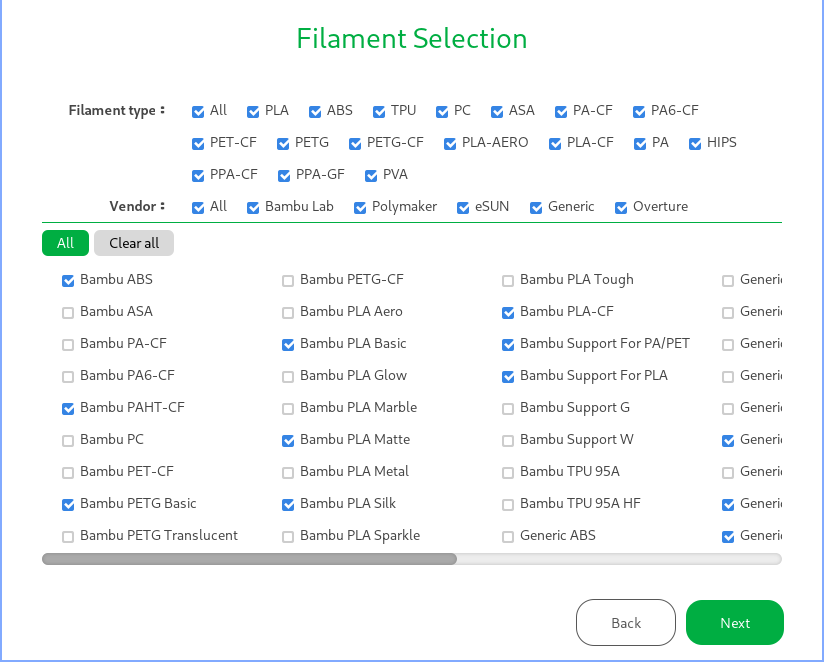
- Customise the filament selection if needed, otherwise just click "Next"
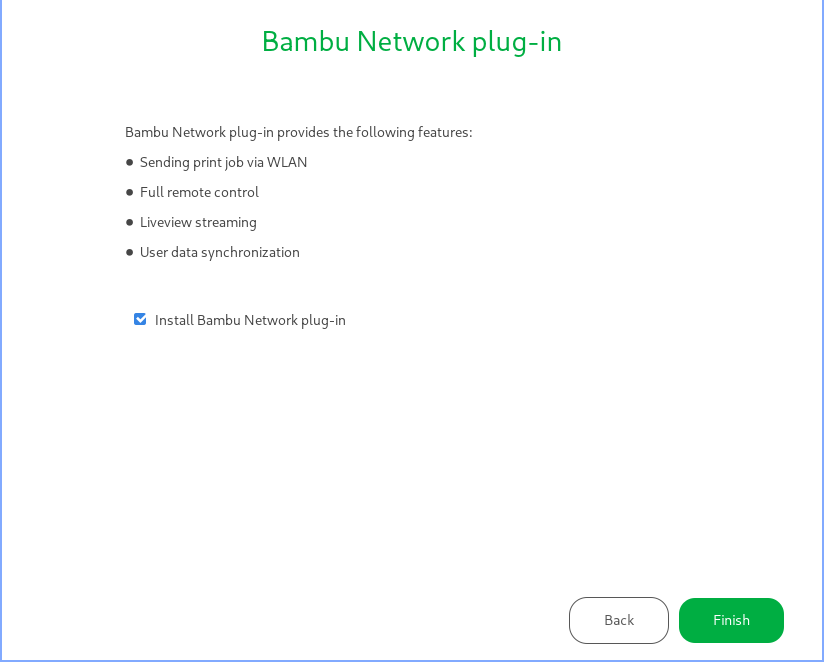
- Ensure "Install Bambu Network plug-in" is checked and click "Finish"
Add printer
- Switch to the "Devices" tab
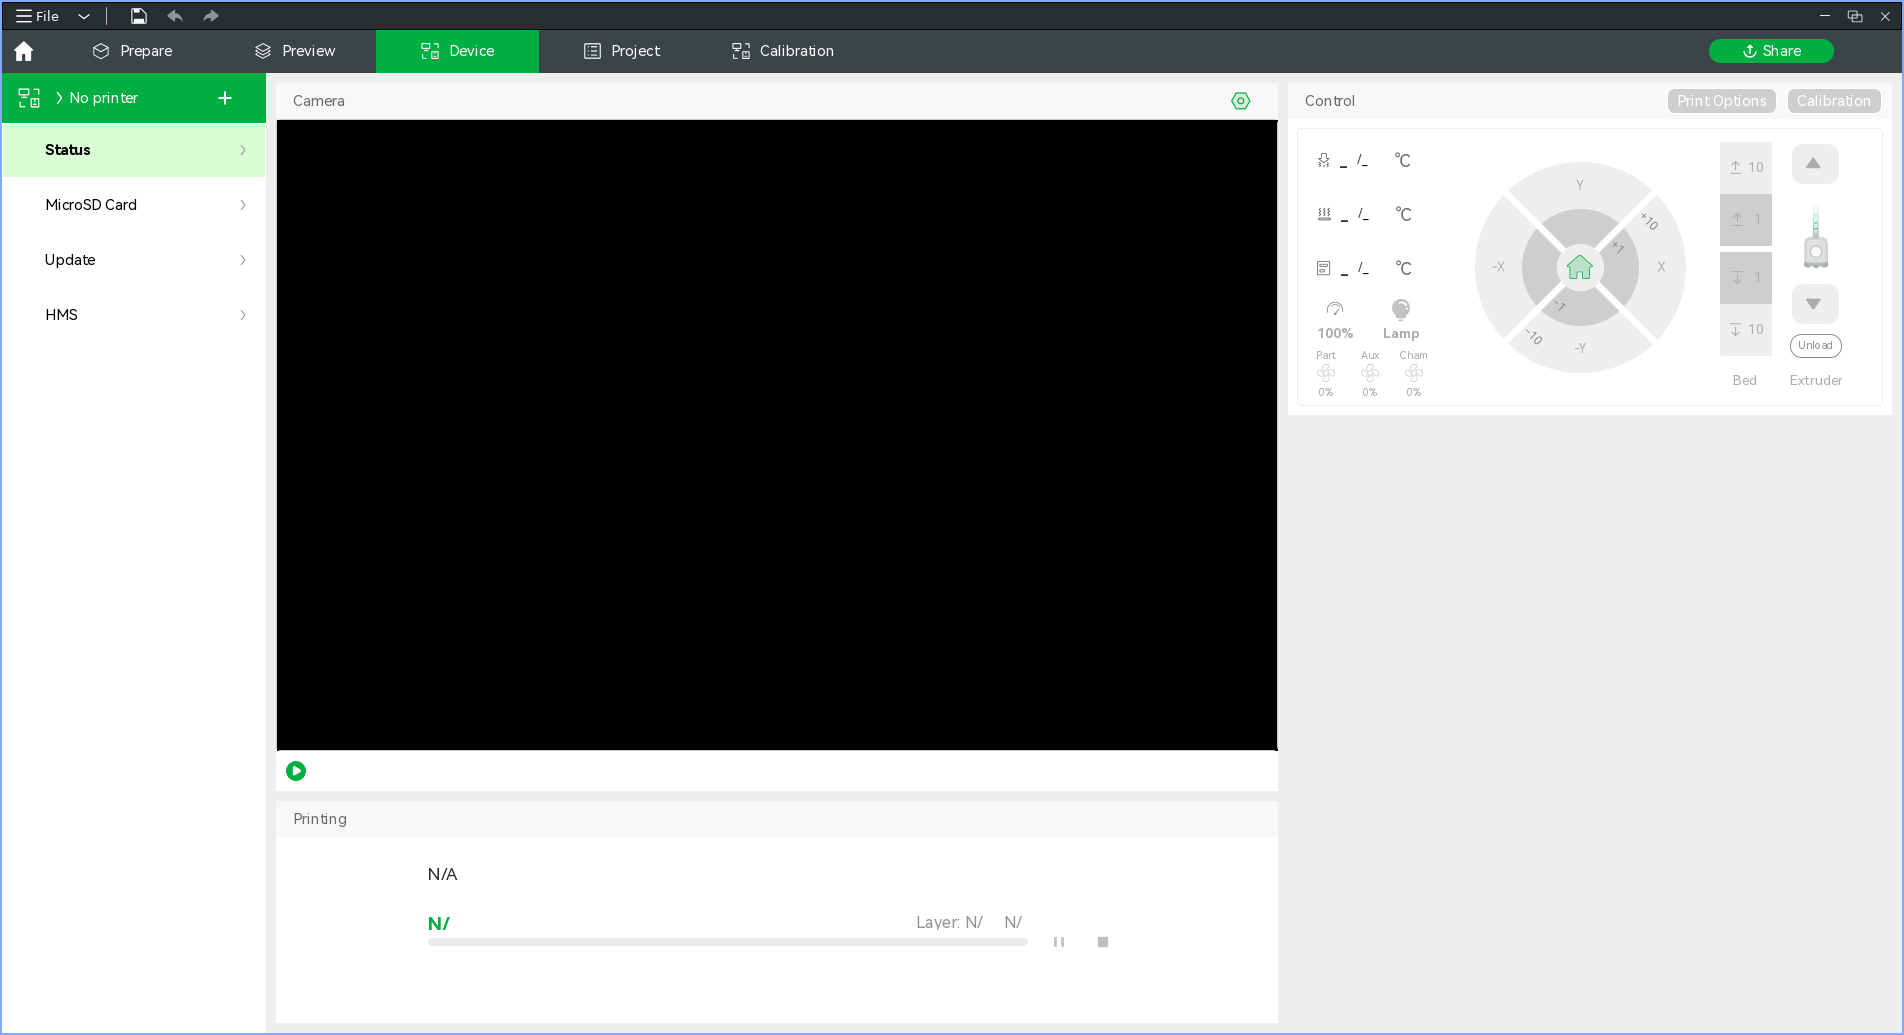
- Click on "No printer" and select "3DP-01P-744" from the list
- When prompted enter the code from the printer menu as instructed
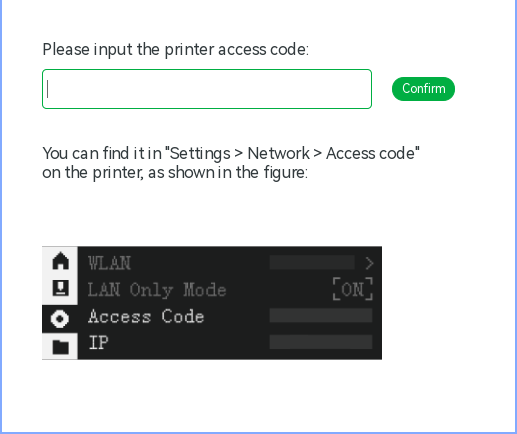
- The printer status should now be shown in the "Device" tab
If you do not see the printer in the device list then most likely your machine is not properly configured to act as an SSDP client. See Simple Service Discovery Protocol and Printer Network Ports for more info. TL;DR: open UDP port 2021 on your machines firewall and try again.
When getting the access code from the printer do not select the refresh icon next to the code.
Loading, Unloading and Configuring Filament
Unloading
- Ensure the filament you wish to remove from the AMS is not currently loaded into the printer
- Pull the filament out of the AMS feeder and lift the spool out
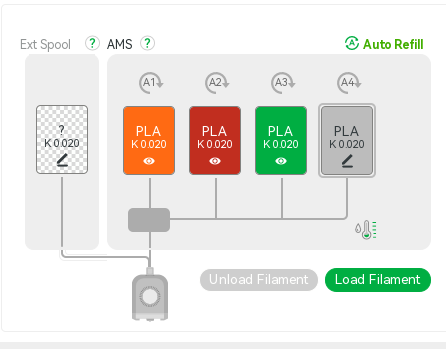
You can tell if a filament is loaded into the printer either by:
- Observing the tube connecting the AMS to the printer, if you cannot see the filament in question inside the tube then it is probably unloaded
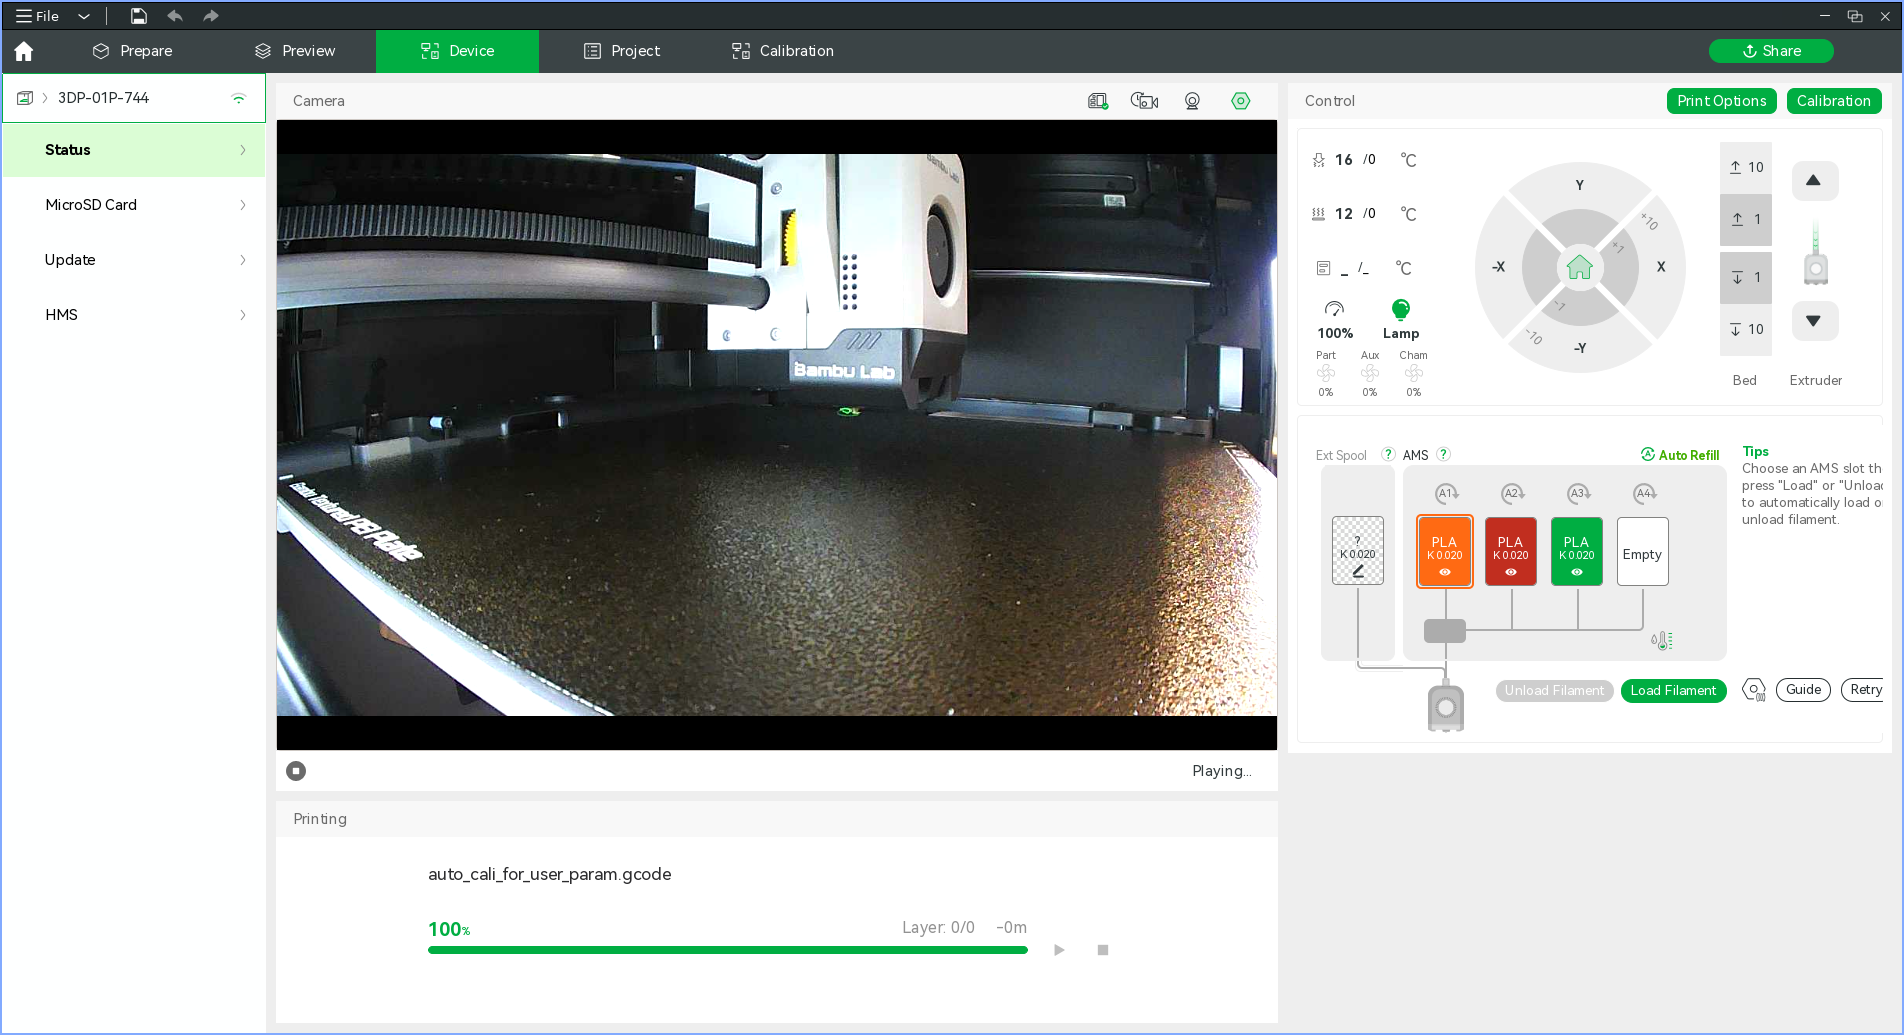
- Checking the diagram on the "Device" tab in Bambu Studio, if the line leading from the spool position is thin and grey then the filament is unloaded
Loading
Bambu Lab filament
- Place the spool in a free AMS slot
- Push the filament into the AMS feeder for the corresponding slot
- Wait 30 seconds or so for the filament to be identified
- Verify that the filament was correctly identified via the "Devices" tab in Bambu Studio
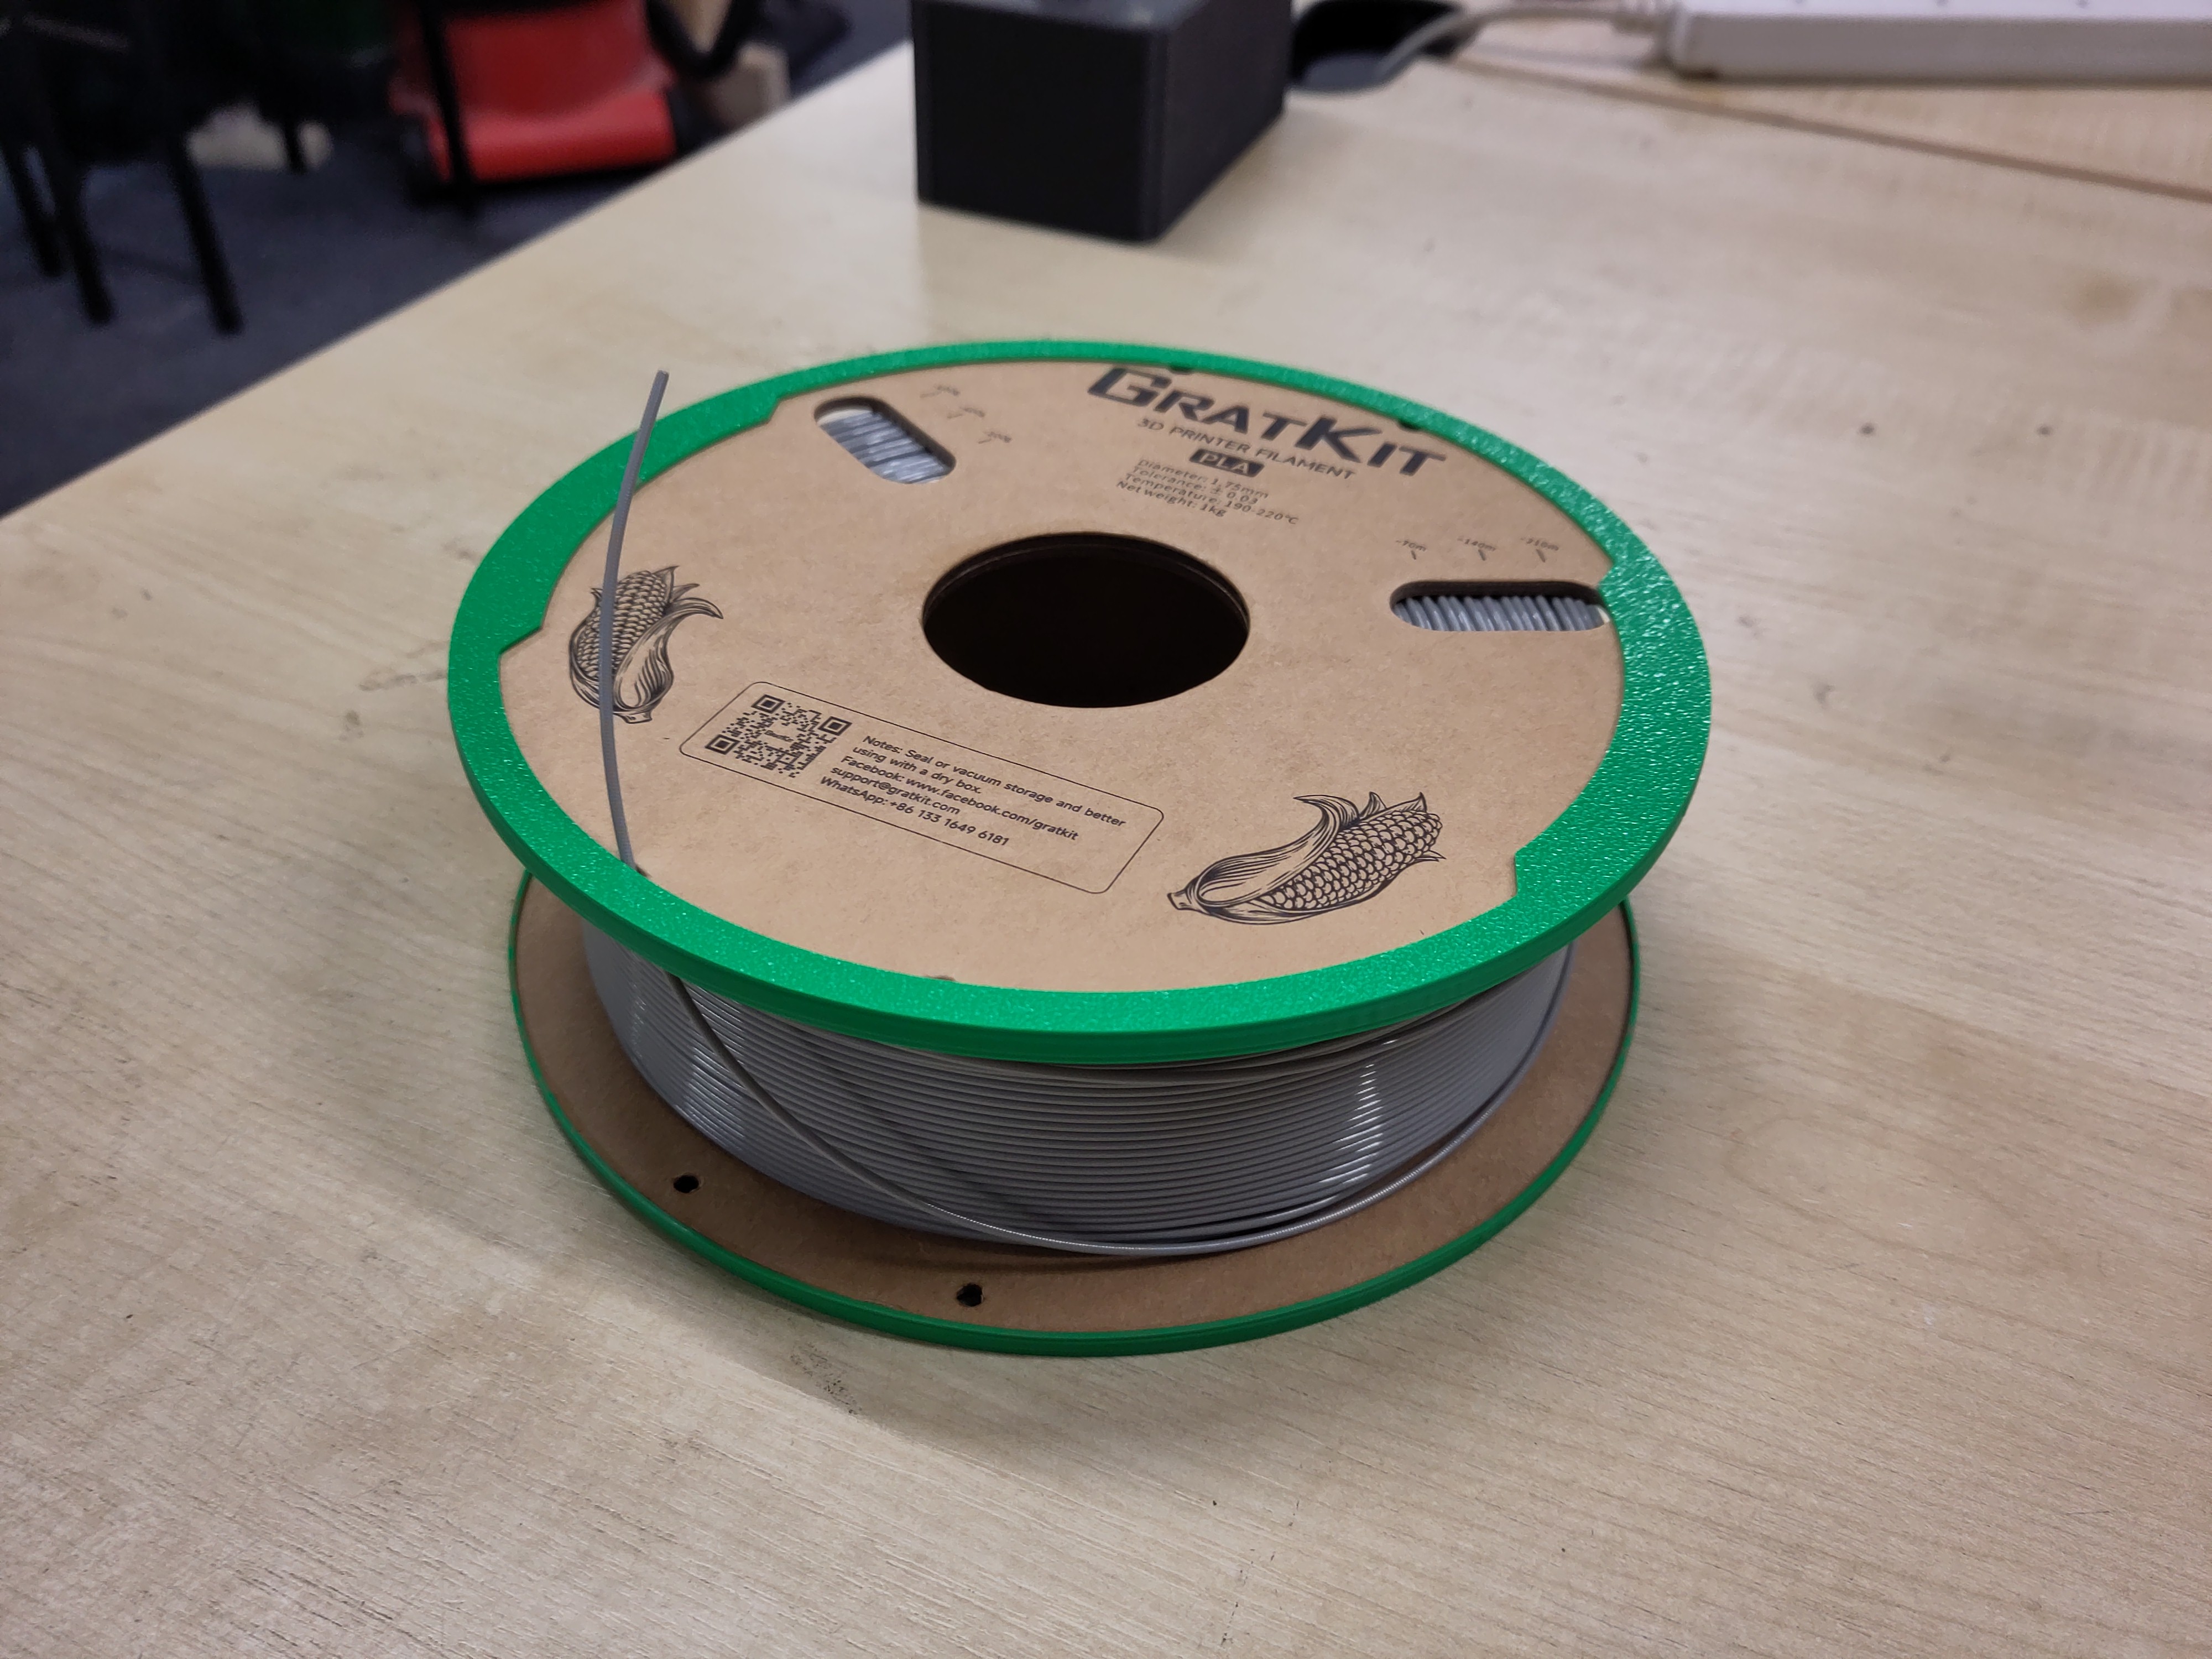
Generic filament on card spools
Filament on card spools should NOT be used directly in the AMS, the spool rollers chew up the card spools and make a mess of the AMS.
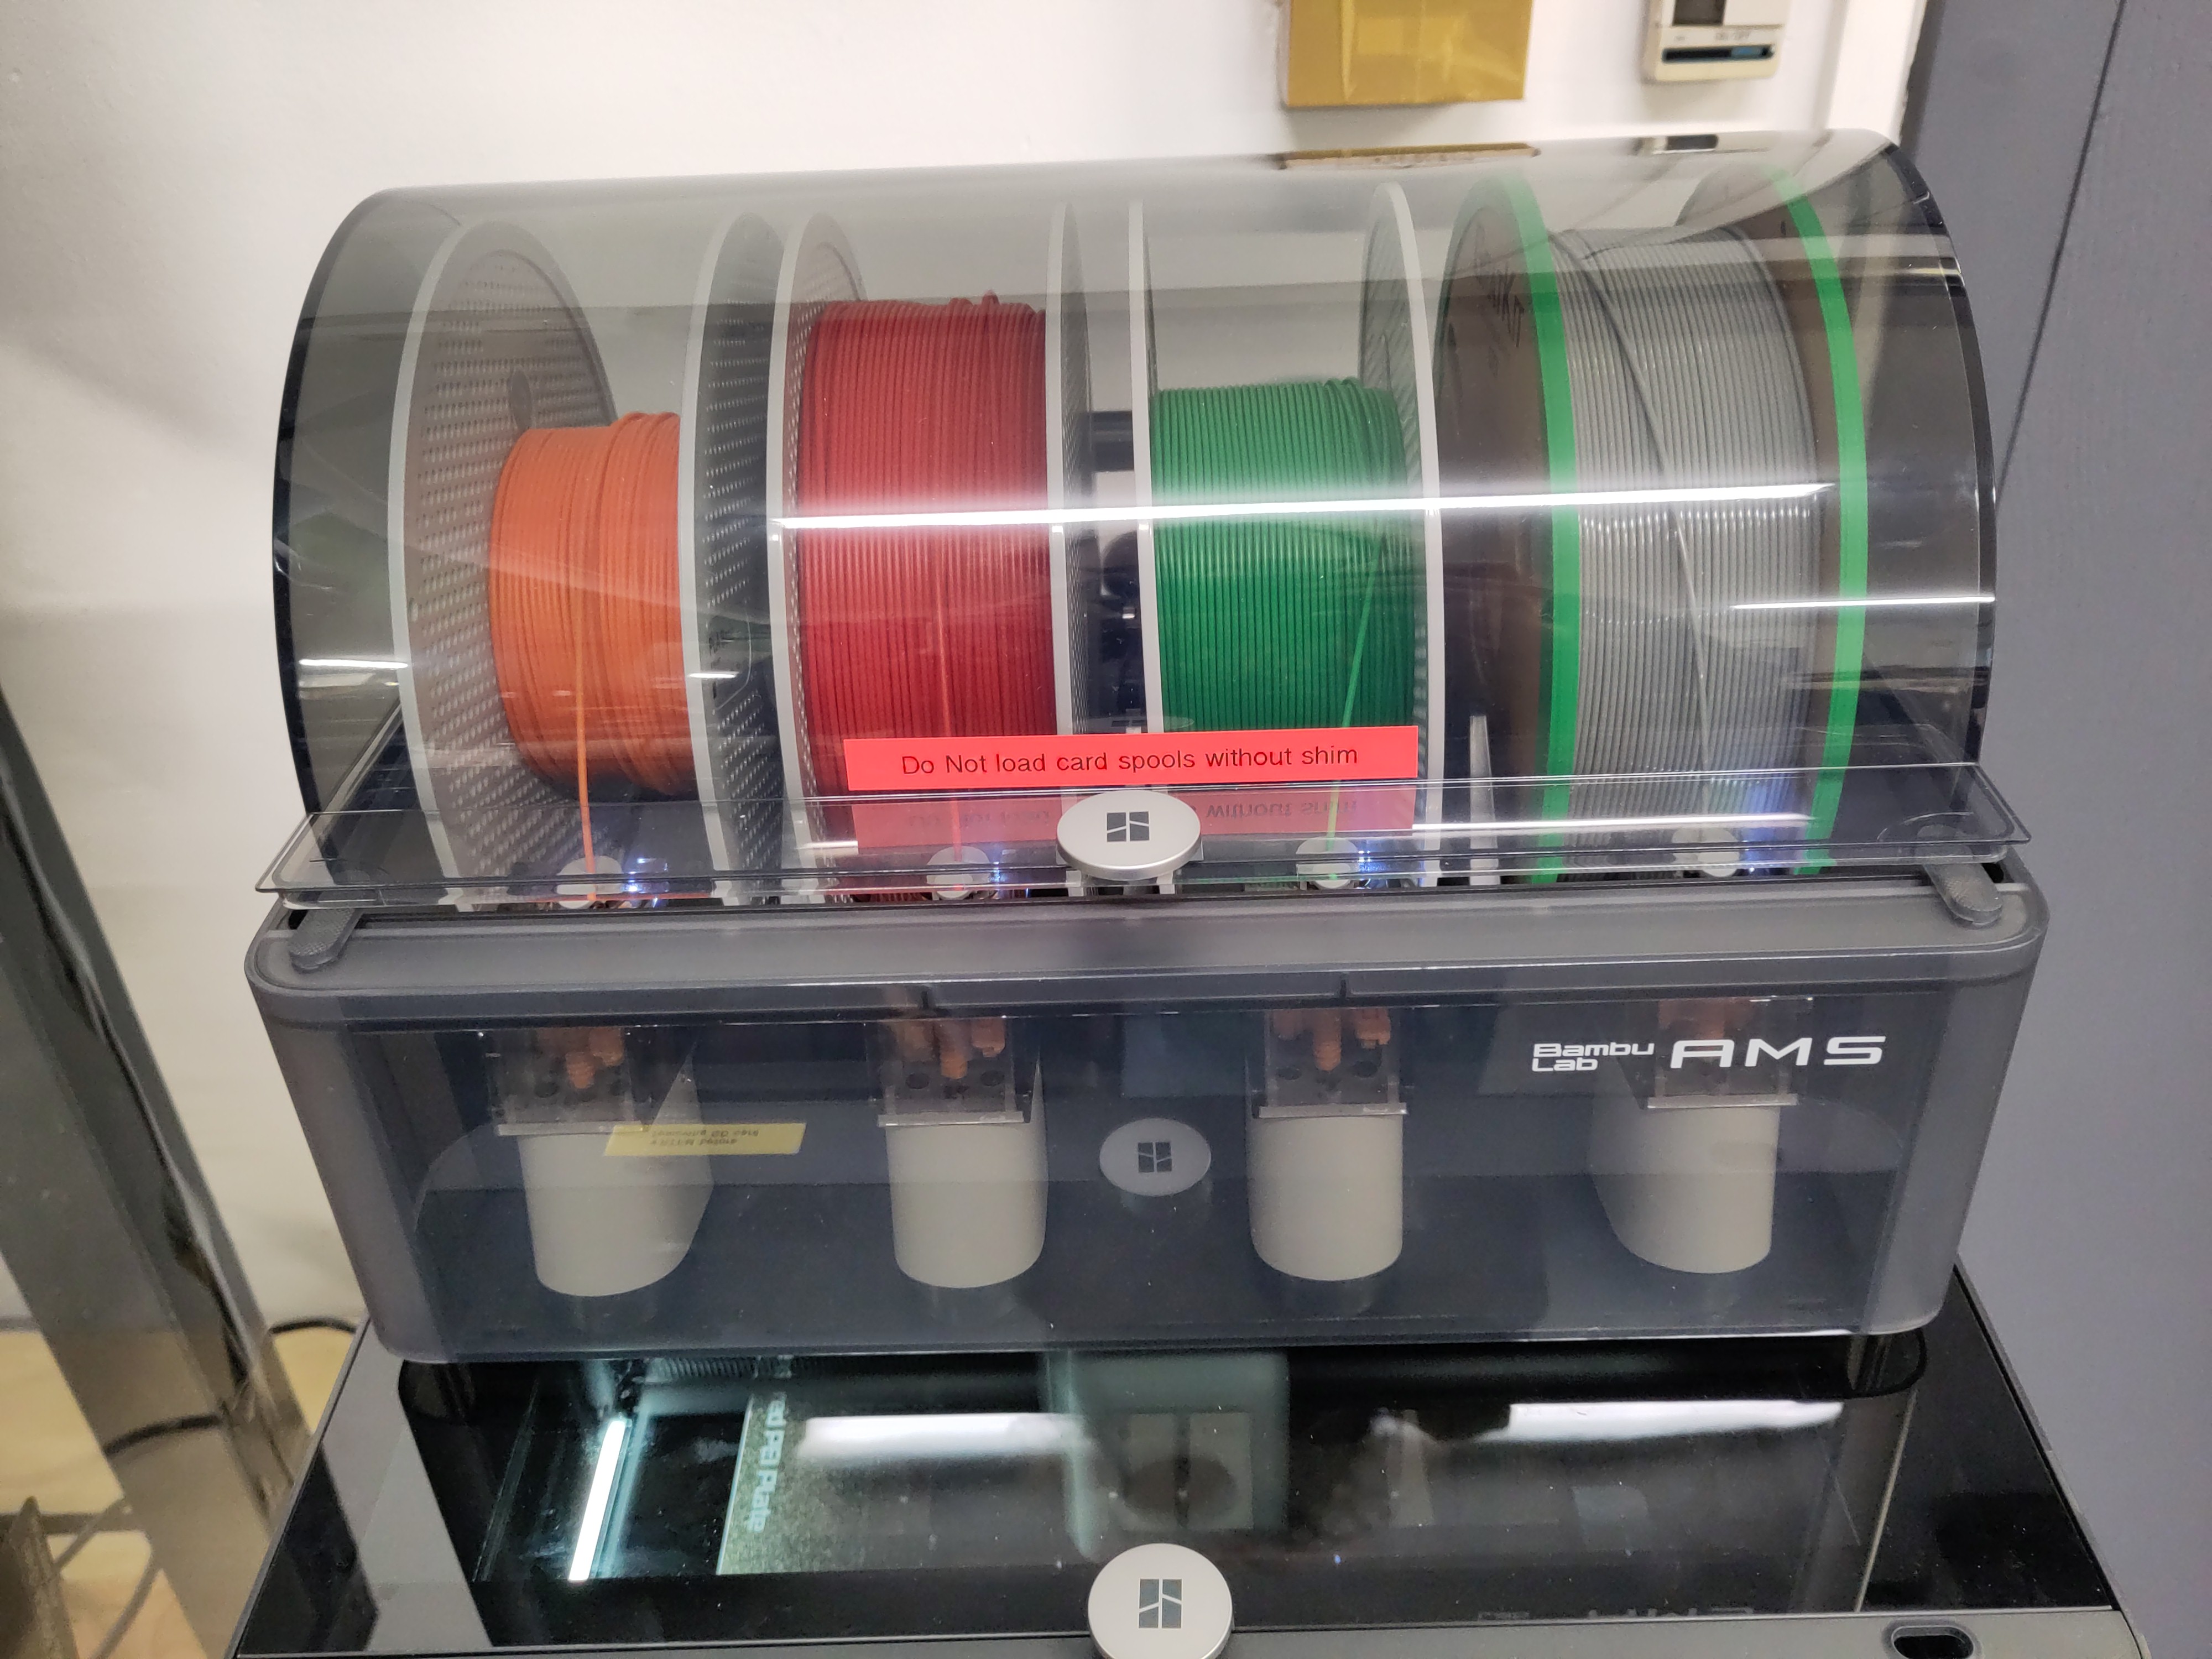
A shim can be printed to protect the edges of the card spool.
Some cardboard spools, once clad with a printed shim, are too wide for the lid of the AMS to be closed without clamping the spool and preventing it from moving. In this case the clips on the AMS lid may be used to prop the lid slightly open as shown below. This should only be done when a filament is loaded into the AMS that would otherwise foul the AMS lid, prefer closing the lid when possible to take advantage of the humidity control offered by the AMS.
Generic filament
- Place the spool in a free AMS slot
- Push the filament into the AMS feeder for the corresponding slot
- In the "Device" tab of Bambu Studio, click the edit icon on the just loaded AMS slot (may show either an "?" or the settings for the last non RFID filament used in that slow)
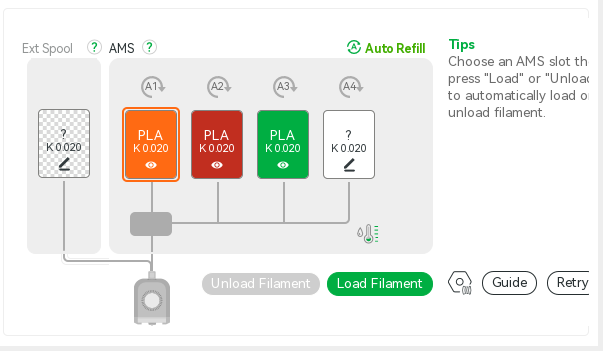
- Edit the parameters and click "Confirm"
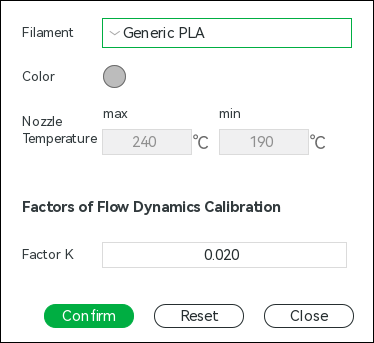
- The "Devices" tab should now show the filament type you specified
Printing
Preparing printer
- Ensure there are no obstacles above or below the bed and that the build plate is correctly seated, located by the white tabs on the rear corners (highlighted in red squares in the photo below)
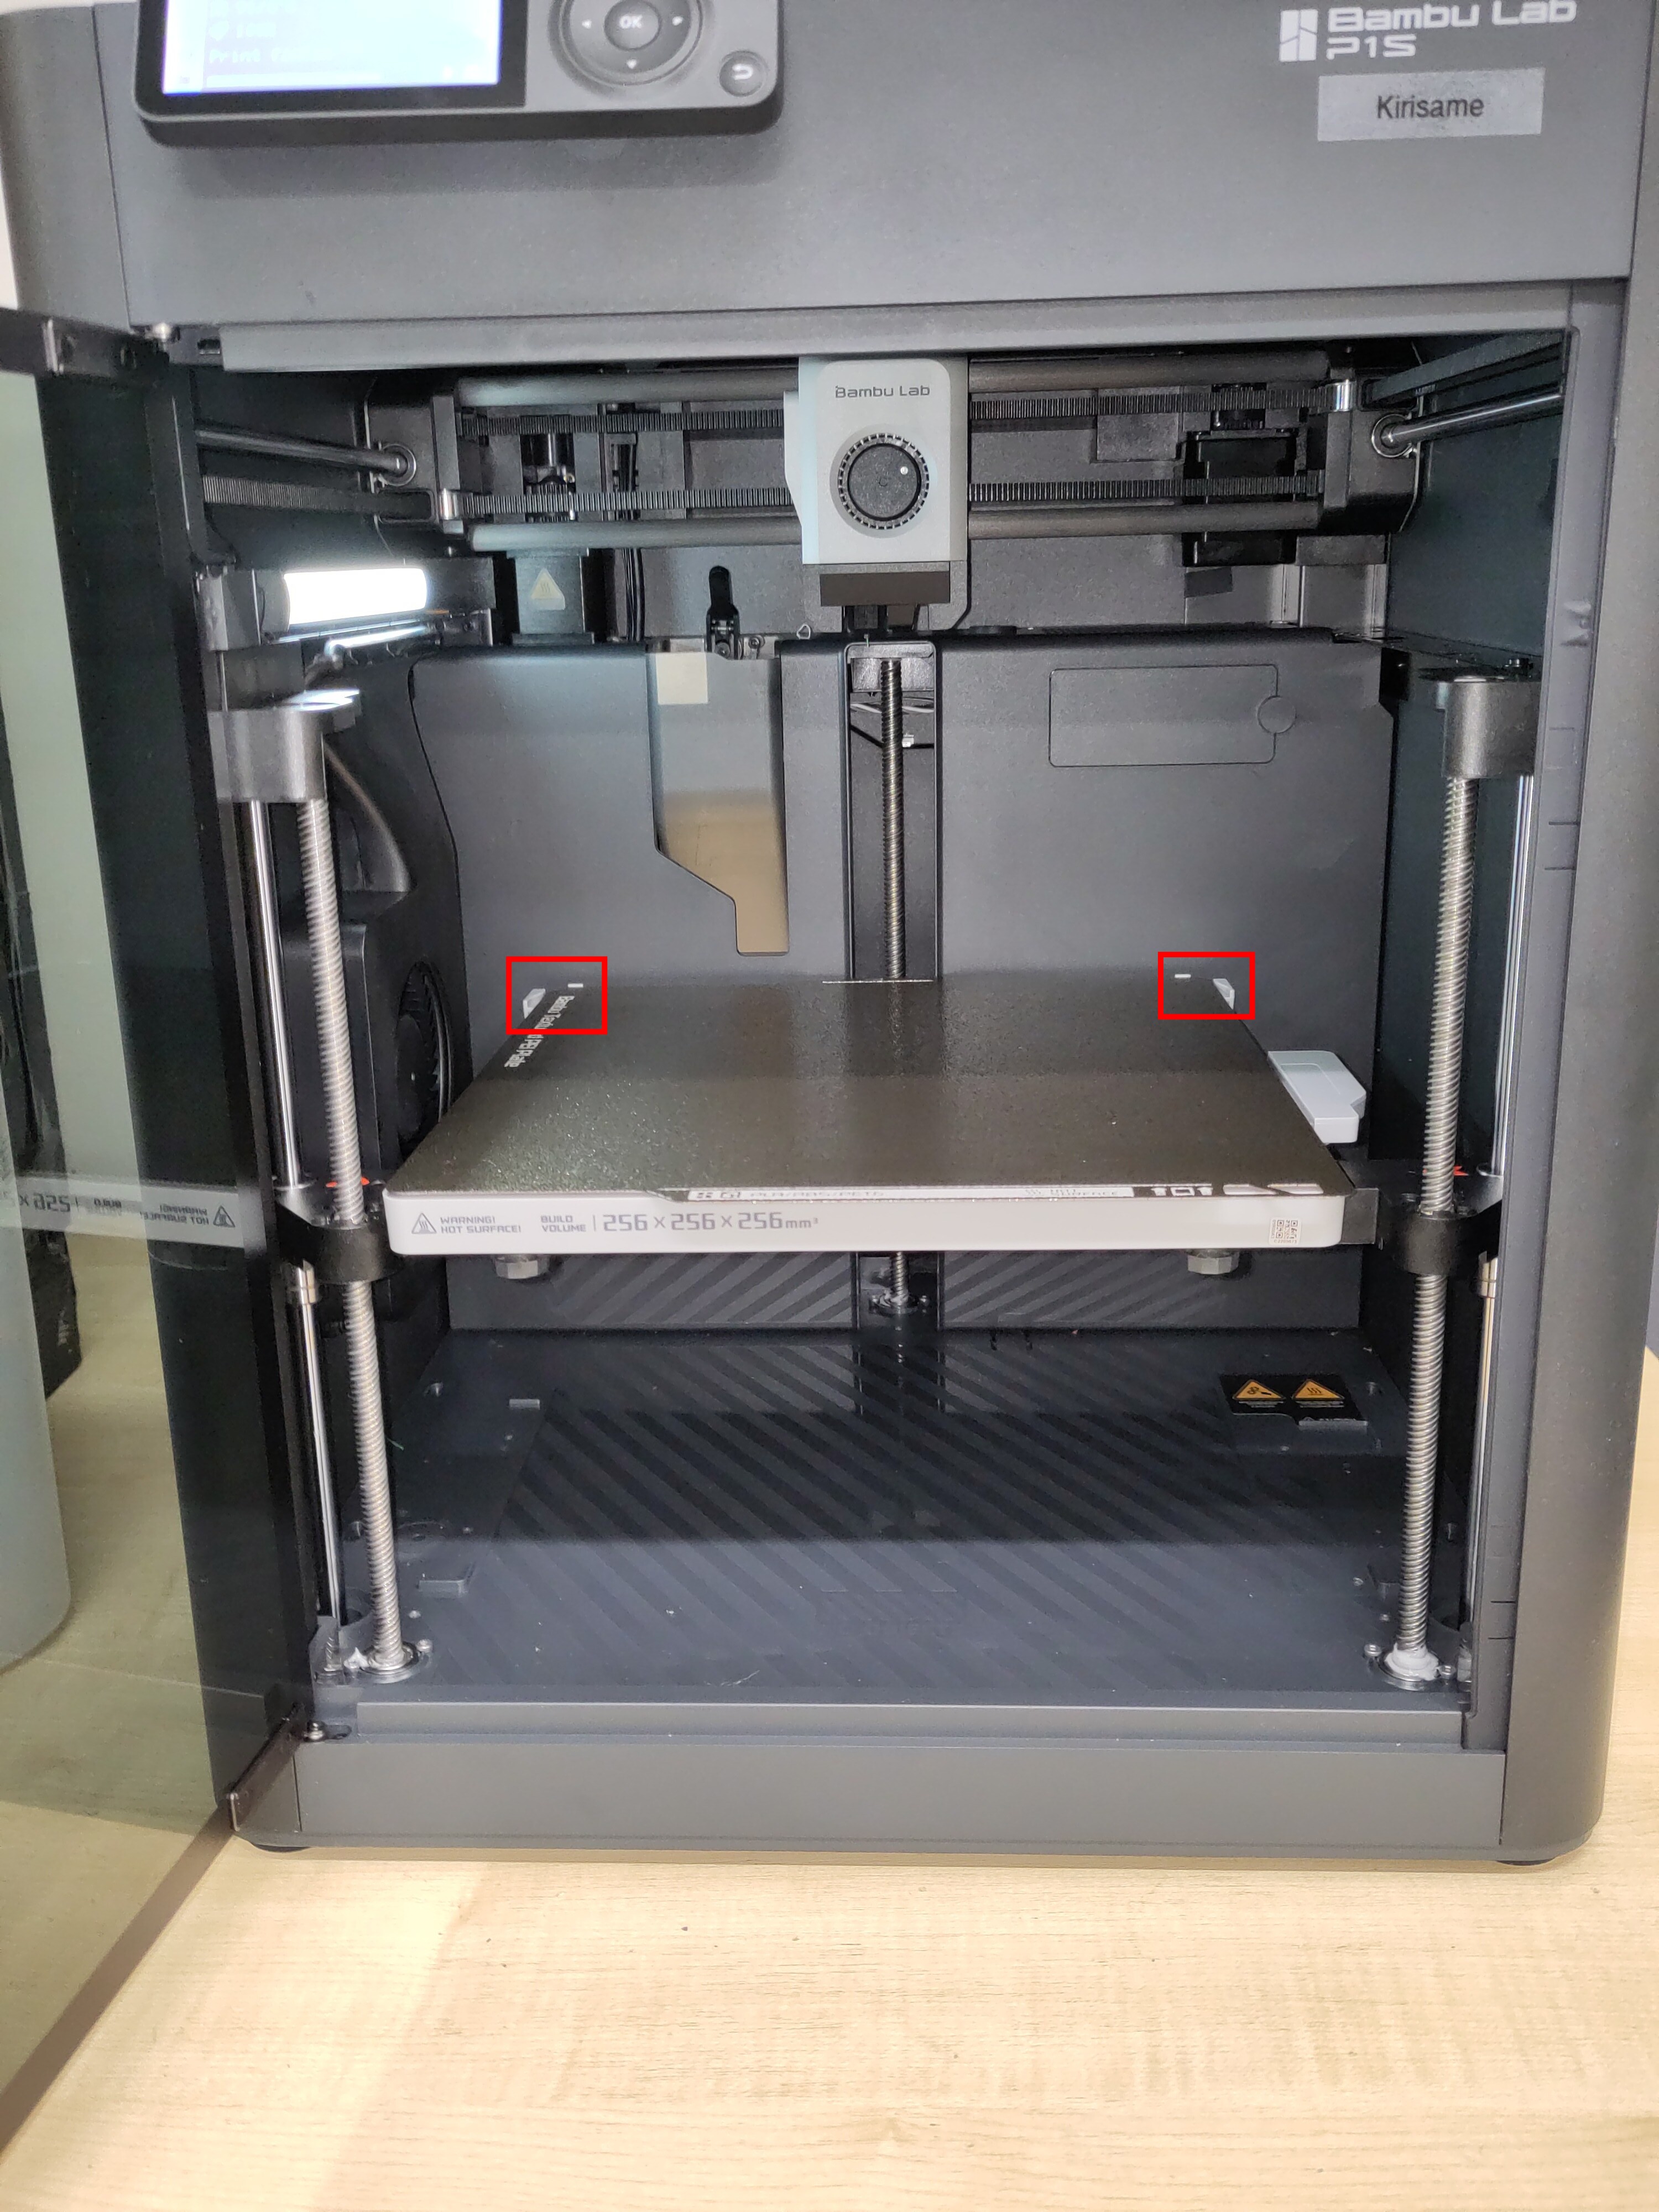
- If you need to change filaments in the AMS, do so now
Preparing and starting job
- Load designs into the "Prepare" tab of Bambu Studio
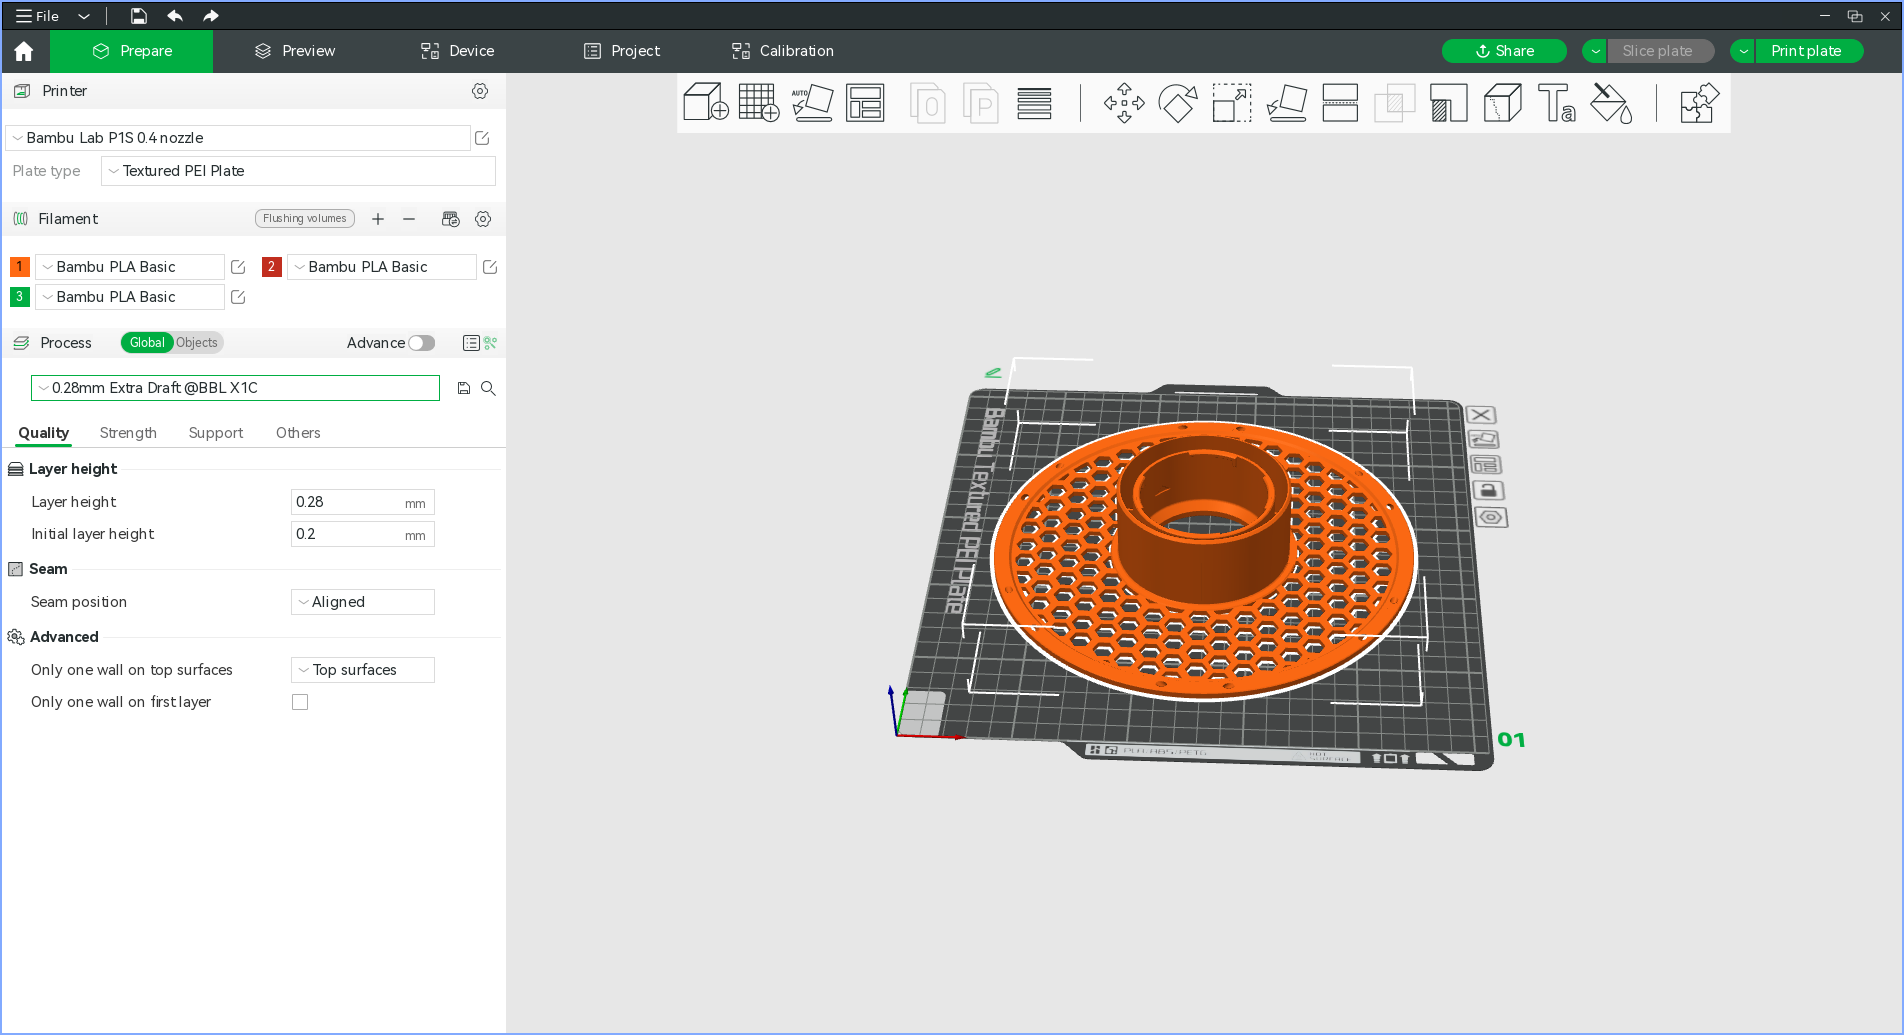
- Synchronise local filament settings with AMS by clicking the
 button on the filament settings panel, this will ensure your local filament settings reflect what is currently available on the printer
 - Set machine, material and slicing settings in the left hand pane (yes the slicing profiles say "X1C", as far as I can tell this is fine)
- Click "Slice plate"
- You will see a preview in the "Preview" tab
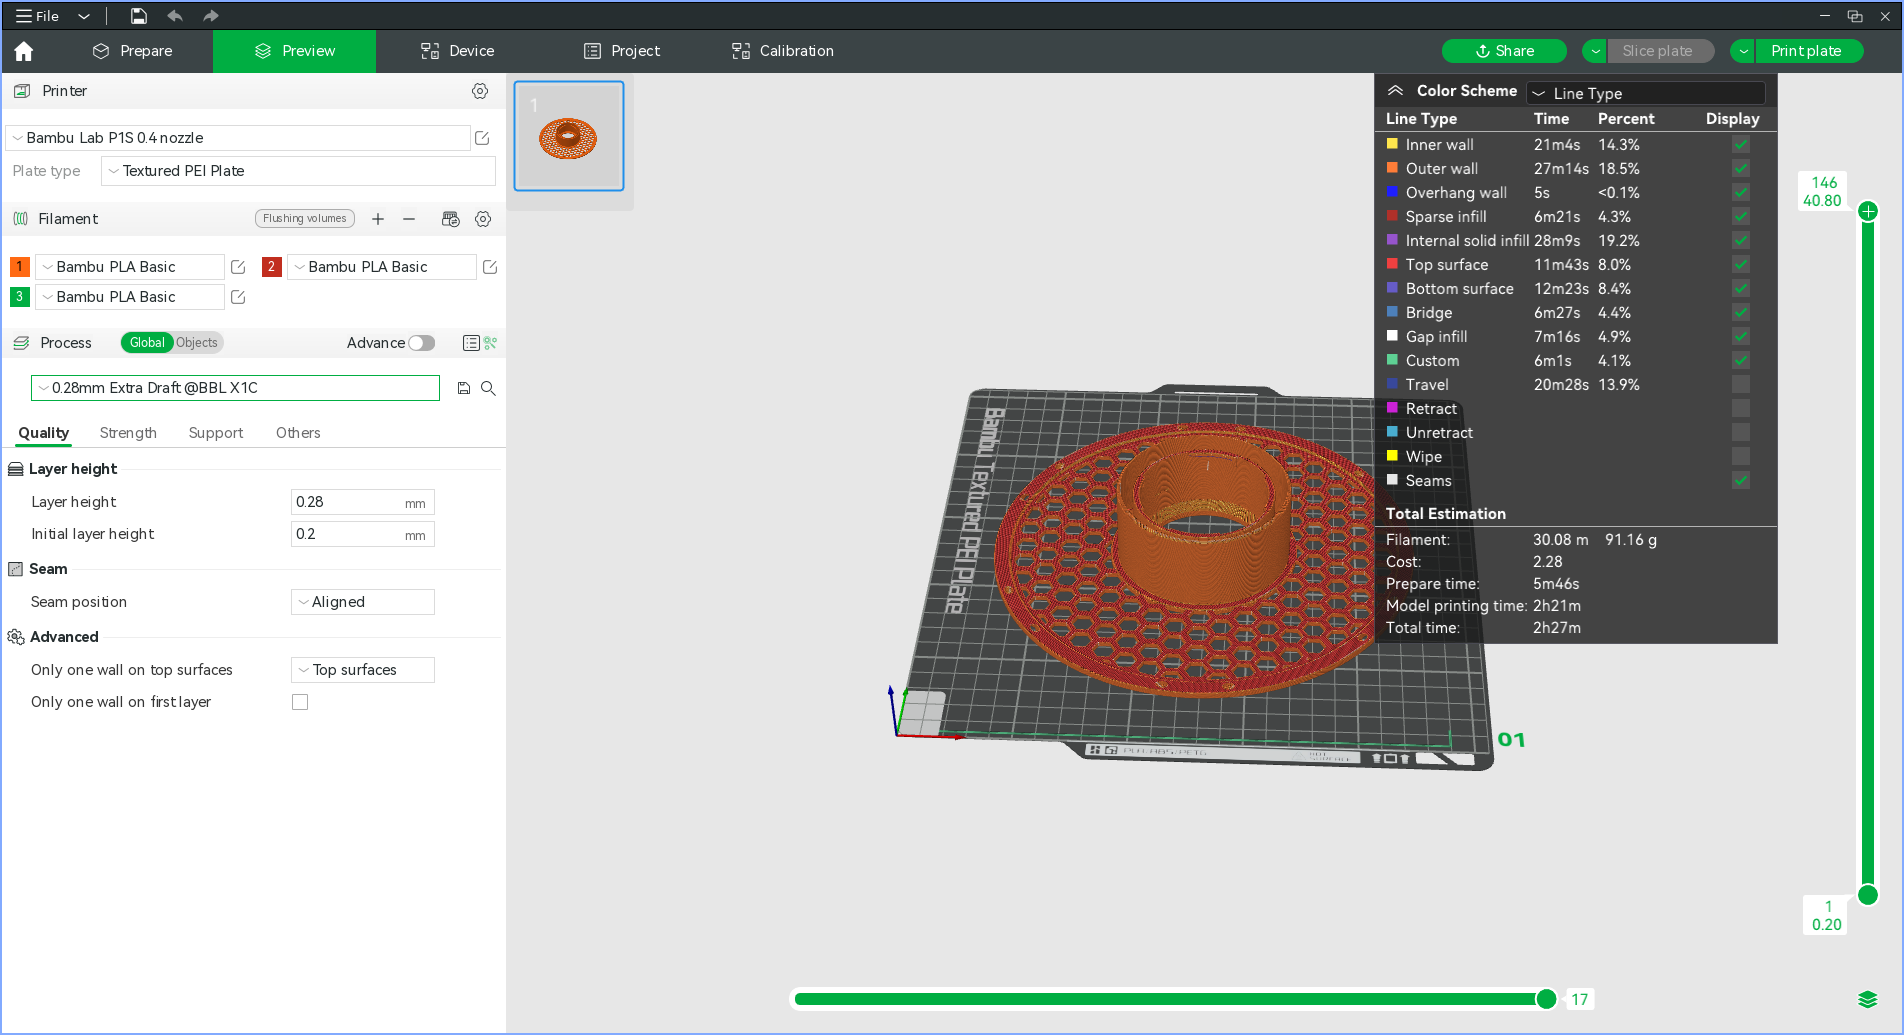
- If all is well, press "Print plate"
- Set options as desired, if you forgot to set the filament for your part you can override this here, disable timelapse if you have no intention of retrieving it, keep bed levelling and AMS enabled
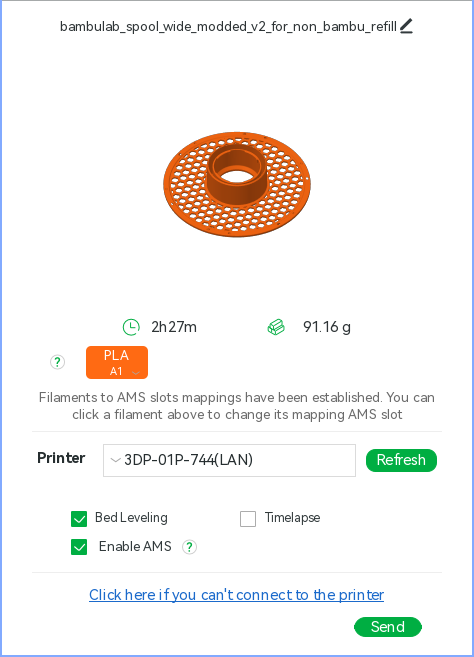
- Click "Send"
- Wait for the job to be uploaded
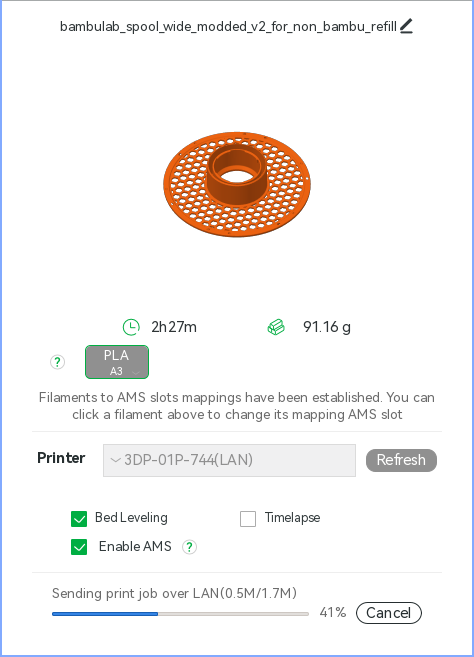
- The "Device" page is automatically shown where you can monitor the jobs progress, adjust settings and temperatures if needed and pause or cancel the job
- It is worth checking that the purge filament has not ended up on the build plate, this should not happen but it is worth keeping an eye out for
End of job
- Remove build plate from printer
- Remove part from build plate
- Reseat build plate in printer
- Clean up any filament the printer has deposited (check the purge chute at the rear of the machine)
SD card
The micro SD card is used for storing print jobs, timelapse and camera recordings (amongst other things that are of little direct use to humans).
It is not advised to use the SD card as a means of getting print jobs onto the machine.
Removing the SD card is how you would get timelapses and camera recordings off the printer, however if you wish to do this then immediately return the card to the printer as removal of the card renders it inoperative.
Should the card be out of space, it can be safely formatted in the printer using the on screen menu.
The Original Prusa MK3. It is fitted with a standard 0.4mm nozzle.
Octoprint is installed on a Raspberry Pi, which is capable of controlling and monitoring the printer over the network. The IP address to access the Octoprint interface is on a label on the front of the printer.
If you'd rather print from the SD card, you might find it useful to create a folder with your name for your files. Please remove any big files once you're done with them to save clogging the card up (same goes for Octoprint).
PrusaSlicer is generally the most straightforward way of slicing your files for printing, as it has a pre-made and tuned profile for the MK3.
If you don't know how to use a 3D printer, or if you're unsure of how to use the specific one in the space, please do ask someone before attempting to.
MS4 Induction checklist
This is a checklist of the things that a person who is inducting a new member to Maker Space should cover during their initial induction tour.
Introduction
Maker Space is a community owned and run working space. We've all clubbed together to get a space to work in. There aren't any grownups looking after this place, its just us, and it works because everyone pulls their weight to keep it running and nice for us all.
If in doubt, ask the mailing list.
- It can be found on the website header -> discussion list
- There is also a private list for members which is for the running of the space. You should have been added to this when you became a member - if not, please say something as you'll be missing out on key announcements.
Access to the space
- Access is available if a keyholder has opened the space. i.e. Welcome Wednesday and regular evening sessions.
- If you need access outside of the normal hours, ask on the discussion list as a keyholder may be planning to be in.
RFID Access
- RFID fobs can be used to access:
- The space, when a keyholder is in.
- Machines that require an induction.
- If you have a compatible fob already, you can use that. We also have some fobs available if you don't.
- Register your fob by swiping the main door a few times and letting an admin know when you did it.
General Safety
- Fire exits - keep clear! / Fire Extinguishers / First Aid Kit
- Be mindful of smoke alarms.
- What to do it fire alarm goes off - muster outside - if you find a fire, sound the alarm, yell etc, then leave.
- Fire assembly point is in the car park at the back of the building.
- Don't leave things on the floor where people might trip over them, bags, cables, project boxes etc, tripping over hurts
- Use ladders when required rather than chairs, tables etc. and make sure it's stable.
- Be mindful of others if you're doing something that might impact on them or if they might. e.g. working in doorways, walkways etc.
- Do not work on live mains electricity, it's quite dangerous.
Toilets / Water / Drainage
- Toilets near entrance.
- Drinking water from Kitchen.
- If you're covered in oil or grease, cleaning supplies (Swarfega etc.) are available. - Currently downstairs by the lathe.
Using the Space
People use the space differently, please be considerate.
- Avoid telling people how to do their project. Sometimes the objective is to learn a new technique rather than solve the problem in the best way.
- Try not to touch or pick up projects without permission.
- Some people are here to be social, some people are here to work and may not want to talk. Please respect their space and leave them be!
Infrastructure/security
- While many things are fair game for hacking/modifying, the core infrastructure/access control systems are not.
- Attempts to 'defeat' security/access control for equipment will be viewed very negatively and may end up in restriction/removal of space access privileges.
- If you want to improve a piece of core infrastructure e.g. music player etc, then discuss any proposed changes with its' current owner/maintainer first.
Parts/Materials
- We have lots of scraps, off-cuts, spares and components etc. which can be used.
- If you need something specific or a lot of something, please provide your own.
Maker Space has a clean desk policy
- Try to tidy up as you go if possible. Work spaces should be clean and tidy before you leave.
- If you need to leave something out, ask on the discussion list.
- Bins, dustpans, brushes, mops, blue roll and vacuum cleaners etc. are around the space.
- If you have cut, sawed, drilled, sanded, filed or ground anything then there will be something to clean up.
Bins
- Large bins in the workshops - Dustpans and brushes attached.
- Small bins around the space.
- Please do not leave food waste in the space.
- Bins currently to be taken home. Please help out if you can.
- Battery disposal - Please take to a battery recycling point e.g. Tesco.
- Recycling - Clean/Dry items that could go in a household recycling bin.
- Ensure cans are empty and not likely to leak in someone's car
- soft plastics/films if marked with "Recycle at Store"
- No electronics/e-waste
Entrance Lobby
Hack or Die
- Items on the shelves are for hacking and remaining items are periodically disposed of.
- Please only add items you realistically think will be used by someone.
- Please don't bring things in just for Hack or Die. Do that virtually (by email) instead.
Laser Cutter
- Induction required - Ask on the members list.
- Scrap material available for use.
Toilets
Workshop
Main room
3D Printers
- No training but ask for help if you need it. Follow the QR code for the Bambu.
- Unattended printing is not allowed.
- Filament is paid for by the users. If you use it, bring some filament in occasionally.
- Do not try to maintain the printer. Notify a maintainer or the discussion list.
Members' Store/ General Storage
- Your box goes here - 32L - 18cm (h) x 60cm (w) x 40cm (d)
- Please stack things carefully, especially high up.
- Ask on mailing list about storing big things in space, before you bring it in.
Chemicals
- Any chemicals in the space should be clearly labelled whether hazardous or not.
- Flammables box - Flammable stuff lives here, put it back after using.
- No dangerous chemicals please.
- No spray painting in the space - ventilation isn't adequate.
- No flames/smoking
Wall o' boxes and other material around space
- OK to use stuff, but please add stuff too - It's all provided by members and rather than the space.
- Please also apply 'fair use' principles to Space items - If you use a lot of something, replace it.
- Put it back in the box and on the correct shelf when done (boxes are colour coded to shelves).
- Glue gun - please make sure you let it cool before putting it away.
- There are "Please hack"/"Do not hack" stickers and labels. Please respect them. If labelling something, write "Please/Do Not Hack", your name and the current date.
Tea and coffee facilities.
- Coffee machine - used for hot water instead of a kettle.
- Bin bags - on shelves.
- Tea/biscuits/sweets etc often on the table - help yourself - feel free to add more
Fridge
- Lemonade/Irn Bru - Free but please replenish what you use.
- Club Mate - Prices/Payment details on the fridge.
Soldering station
- Turn irons off after use
- If don't know how to use, please ask
- Hot tools/irons shouldn't be left unattended
- Let stuff cool before putting away
- Scraps tub for collecting bits of wire etc. Please don't leave bits all over the desk.
Stationery
- In grey drawers
Media Centre
- Green Button - Play/Pause (Random tracks if playlist is clear)
- Red "Fire" Button - Short press skips track, Long press (2 Secs) clears playlist.
- For full control use http://mediaserver:9000/
- Apps available to control music from your phone (e.g. Squeezer)
Side room (Goldfish Bowl)
- PCs available for use. Please don't install crap
- Vinyl Cutter
- Electronic component storage - keep it tidy!
- Items Stored on the shelves belong to the space. They can be used but not to be hacked. Don't take them away from the space without permission.
Basement
There are PPE boards - please use them.
- We have provided it, it's your job to use it. It's OK to remind people you see not using it when they should be.
- Dust masks are available from the "Spare PPE" box.
- If you know you're going to need specific PPE for a certain task ahead of time (respirator, coveralls), consider bringing it yourself.
- Hearing protection - if you are making lots of loud noise make sure you and others near you wear it.
- If you are making flying objects, ensure people who may be affected know and are offered eye protection.
Clean up after yourself
- Tools / Bench top / Floor
Tools
- Sander / Pillar Drill / Lathe / Mill / Band Saw / Workbee CNC
- RFID Controlled. Induction Required, ask on the members list or email the maintainer to get inducted.
- Hand tools generally around the space on boards.
- Drills, hand power tools, Dremel and bits/collets near the Workbee CNC machine.
- Return tools when you have finished with them, definitely before leaving space.
Storage
- Wood Store - Help yourself - Add more wood/offcuts when finished own projects. Please check for "Do Not Hack" stickers before using.
- Nuts/Bolts/Screws - please keep tidy - use "M Don't Know" if you can't determine the size.
- Metal Store - to be used for projects etc. Be careful of sharp edges, don't leave any for others.
- Table legs may not be spare. Please check before using.